from PIL import Image, ImageGrab
import os
class ImageMatch:
def __init__(self):
self.screen = None # 定义全屏大图对象
self.target = None # 定义模板图片对象
self.screendata = None # 定义全屏大图数据用于存储像素数据
self.targetdata = None # 定义模板小图数据用于存储像素数据
# 定义一个简单的对比,由于匹配过程中的判断t1, t2的参数代码每个像素点的RGBA值
def compare(self, t1, t2):
if t1[0]==t2[0] and t1[1]==t2[1] and t1[2]==t2[2] and t1[3]==t2[3]:
return True
else:
return False
# 模板匹配的核心程序
def find_image(self, image_name):
image_dir = os.path.abspath('.') + "\\source\\" # 定义图像的默认目录
# 截取当前屏幕图像并加上Alpha通道数据
self.screen = ImageGrab.grab().convert("RGBA")
self.target = Image.open(image_dir + image_name) # 打开模板图像
screenwidth, screenheight = self.screen.size # 得到大图的宽和高
targetwidth, targetheight = self.target.size # 得到小图的宽和高
self.screendata = self.screen.load() #加载大图像素数据
self.targetdata = self.target.load() #加载小图像素数据
posx, posy = -1, -1 # 定义目标位置,默认为-1,-1,表示没有找到元素
# 遍历每一个像素点,注意不需要遍历到screenheight或者screenwidth这么多
# 需要减少掉小图的宽和高,否则小图就会滑动到大图之外,没有任何意义,并且还会越界
for y in range(0, screenheight-targetheight):
for x in range(0, screenwidth-targetwidth):
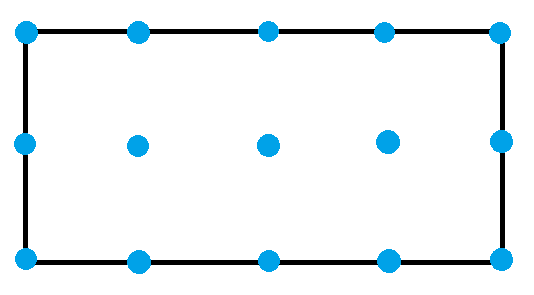
# 比较小图的5个顶点与大图的对应区域的5个像素点是否匹配,
# 匹配才遍历小图的每一个点,不匹配可以直接跳过,滑动到下一个像素点。
if (self.compare(self.screendata[x, y], self.targetdata[0, 0]) and #左上角
self.compare(self.screendata[x + targetwidth-1, y], self.targetdata[targetwidth-1, 0]) and # 右上角
self.compare(self.screendata[x, y + targetheight - 1], self.targetdata[0, targetheight - 1]) and # 左下角
self.compare(self.screendata[x + targetwidth - 1, y + targetheight - 1], self.targetdata[targetwidth - 1, targetheight - 1]) and # 右下角
self.compare(self.screendata[x + targetwidth / 2, y + targetheight / 2], self.targetdata[targetwidth / 2, targetheight / 2]) # 中心点):
is_matched = self.check_match(x, y)
if is_matched: # 计算得到模板图片中心点位置的精确坐标
posx, posy = x + int(targetwidth / 2), y + int(targetheight / 2)
return (posx, posy)
# 针对模板图片的全像素匹配,看是否能够成功匹配(此处暂时不考虑匹配度,即100%匹配)
def check_match(self, x, y):
targetwidth, targetheight = self.target.size
for smally in range(0, targetheight):
for smallx in range(0, targetwidth):
if not self.compare(self.screendata[x+smallx, y+smally], self.targetdata[smallx, smally]):
return False
return True
# 判断是否匹配到一个成功的元素(用于测试断言)
def check_exist(self, imagepath):
result = self.find_image(imagepath)
if (result[0] == -1 and result[1] == -1):
return False
else:
return True
|
:


